When it comes to cultivating your own kale indoors, there’s a certain joy that comes with knowing you’ve nurtured your greens from tiny seeds to vibrant, nutrient-packed leaves. For those of us who don’t have the luxury of a spacious backyard, growing kale indoors becomes an exciting and rewarding endeavor. In this guide, we’ll walk through the steps of cultivating kale from seeds, with a particular focus on utilizing LED grow lights to mimic the sun’s nurturing rays.
Choosing the Right Seeds
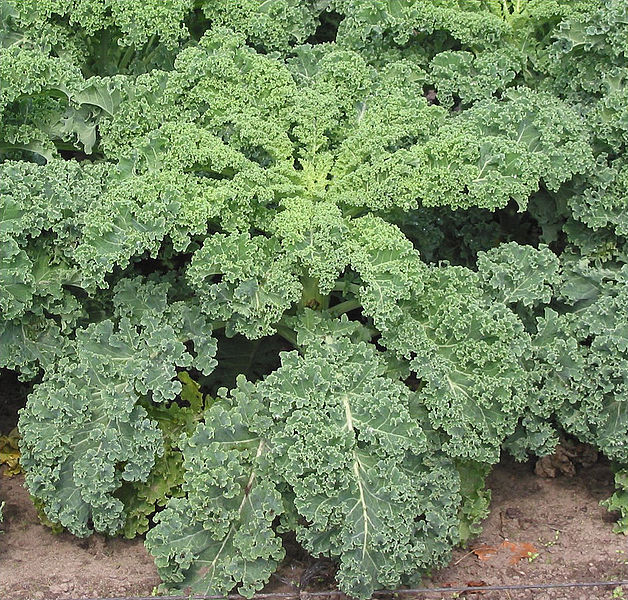
As an aspiring indoor gardener, selecting the right kale seeds is the first step on your journey. Visit your local gardening store or explore online options for a variety of kale seeds that suit your taste and space. From the classic curly kale to the more adventurous dinosaur kale, the options are aplenty. Take a moment to envision the lush greenery you hope to harvest in the months to come.
Preparing the Soil
Kale, a leafy green vegetable, is known for its ability to thrive in specific conditions. In order to provide the best environment for your kale to grow and flourish, it is recommended to use well-draining soil that is rich in organic matter. To create an ideal blend, you can combine potting soil, compost, and perlite. This combination will ensure that your kale plants have the necessary nutrients and proper drainage.
When planting your kale, it is important to choose the right containers, such as pots or trays, that can accommodate the growth of the plants. Leave a few inches of space from the rim of the containers to allow room for the kale to expand and develop fully.
Sowing the Seeds
To ensure successful germination, it is important to handle the kale seeds with care. Start by gently placing the seeds on the surface of the soil, making sure to space them out evenly. Take a moment to press the seeds lightly into the soil, allowing them to make good contact for optimal growth. Once the seeds are in place, it’s time to provide them with the moisture they need. Mist the soil surface with water, ensuring that it is adequately damp for germination to occur. And here’s a pro tip: create a favorable environment for your seedlings by covering the containers with plastic wrap. This will create a mini greenhouse effect, trapping heat and moisture and providing the perfect conditions for the seeds to sprout and thrive.
Harnessing the Power of LEDs
One crucial factor in indoor kale cultivation is providing sufficient light. While natural sunlight is ideal and beneficial for the growth of kale, it may not always be feasible or accessible. In such cases, LED grow lights come to the rescue. These artificial light sources effectively simulate the sun’s rays, providing the necessary light energy for photosynthesis and ensuring that your kale plants receive the energy they need to thrive and flourish.
During the germination phase, it is important to position the LED grow light about six inches above the soil. This proximity ensures that the kale seedlings receive an adequate amount of light for their growth. As your kale seedlings continue to grow, it is recommended to gradually increase the height of the LED grow light to maintain an optimal distance. This adjustment allows the plants to receive the right amount of light without being too close or too far away.
In addition to the distance, the duration of light exposure is also crucial for the growth of kale. Generally, kale plants require around 12 to 16 hours of light per day. However, it is important to note that the specific light requirements may vary depending on the variety of kale you are cultivating. It is advisable to experiment with the timing of light exposure to find the ideal duration that promotes the best growth and development for your specific kale variety.
Understanding the significance of light in the growth process, I decided to incorporate LED grow lights into my indoor garden. During my research, I came across several reputable brands offering LED grow lights specifically designed for horticultural purposes, such as Batagrowlight. After careful consideration, I chose a model that not only fit my budget but also met the specific needs of kale cultivation. This LED grow light provided the essential spectrum of light required for optimal photosynthesis, ensuring healthy seedling development and overall plant growth.
Nurturing Growth
Watering your kale plants is crucial for their healthy growth. It is important to strike a balance when it comes to watering them. Aim to keep the soil consistently moist, as this will help the kale plants thrive. However, be cautious not to overwater them, as excessive water can result in root rot, which can be detrimental to the plant’s health.
In addition to watering, providing the necessary nutrients is also essential for robust growth. As your kale matures, consider introducing a balanced liquid fertilizer every two weeks. This will ensure that the plants receive the required nutrients for their optimal development and overall health.
Furthermore, it is crucial to stay vigilant and monitor your kale plants for any signs of pests. Pests can pose a threat to the well-being of your indoor kale oasis. Regularly inspect the leaves and stems, and take immediate action if you notice any signs of pests. By doing so, you can maintain a pest-free environment and ensure the longevity of your kale plants.
Reaping the Fruits of Your Labor
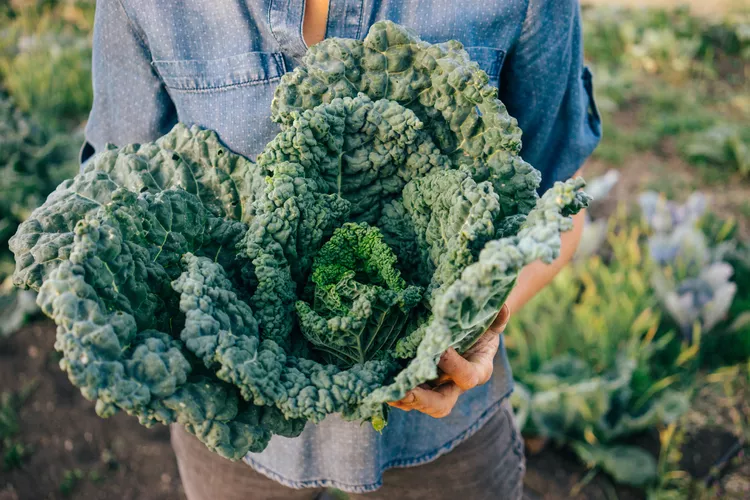
As your kale reaches maturity, it’s time to savor the fruits of your labor. Harvest the outer leaves, allowing the inner leaves to continue growing. This practice ensures a continuous supply of fresh kale for your culinary adventures. Whether you’re tossing it in salads, blending it into smoothies, or sautéing it for a side dish, your homegrown kale is a testament to your dedication as a gardener.
Sharing the Journey
Inspired by my success, I sought to share my experience with others. Platforms like Hempful Farms and Farmers Classic provided valuable insights and served as a community where I could exchange tips and learn from fellow growers. These online resources became my go-to for troubleshooting and expanding my knowledge.
Final word
In conclusion, growing kale indoors from seeds with LED grow lights is a fulfilling endeavor that brings nature’s bounty into your home. From the careful selection of seeds to the patient monitoring of growth, each step contributes to the success of your indoor kale garden. With the right care and a touch of technological assistance, you’ll soon be enjoying the crisp, flavorful kale you’ve cultivated with your own hands. Happy growing!
FAQs for Growing Kale Indoors From Seeds With LED Grow Light:
- What are the advantages of using LED grow lights for growing kale indoors from seeds?LED grow lights provide a spectrum of light that is ideal for plant growth, promoting photosynthesis. They are energy-efficient, emit less heat, and can be tailored to the specific needs of kale at different growth stages.
- How far should I position the LED grow light from the kale seedlings, and is there an optimal duration for daily light exposure?Place the LED grow light about 12 to 18 inches above the kale seedlings. Aim for 12 to 16 hours of daily light exposure to simulate natural daylight conditions and promote healthy growth.
- What type of kale seeds are best for indoor cultivation, and when is the ideal time to start the seeds indoors?Select compact or dwarf varieties suitable for indoor spaces, such as Lacinato or Red Russian kale. Start the seeds indoors approximately 6-8 weeks before the last expected frost date for your region.
- Do I need any specific soil mix for growing kale indoors, and how often should I water the seedlings under LED grow lights?Use a well-draining potting mix rich in organic matter. Water the seedlings when the top inch of the soil feels dry, ensuring consistent moisture without waterlogging. Proper drainage is crucial for kale’s healthy development.
- Can I grow kale indoors year-round with LED grow lights, and are there any additional tips for successful indoor kale cultivation?Yes, you can grow kale indoors throughout the year with LED grow lights, ensuring a steady supply of fresh greens. Rotate the pots occasionally to expose all sides of the plants to light evenly, and consider supplementing with organic fertilizer for optimal nutrition.